| “This site contains affiliate links for which OEMDTC may be compensated” |
| Classification: | Reference: | Date: |
| RA05-002a | NTB06-008a | February 8, 2006 |
2004-2006 TITAN; REAR LEAF SPRING SQUEAK
| This bulletin has been amended. The Parts Information section has been revised. No other content has been changed.
Discard all previous versions of this bulletin. |
| APPLIED VEHICLE(S): | 2004-2006 Titan (A60) |
|---|---|
| APPLIED VIN(S): | Vehicles built before 1N6AA06A(*)6N507692 |
| APPLIED DATE(S): | Vehicles built before August 24, 2005 |
IF YOU CONFIRM
There is a squeak from the leaf spring wind-up clip area when:
- going over bumps
Or
- by compressing the rear suspension
ACTION
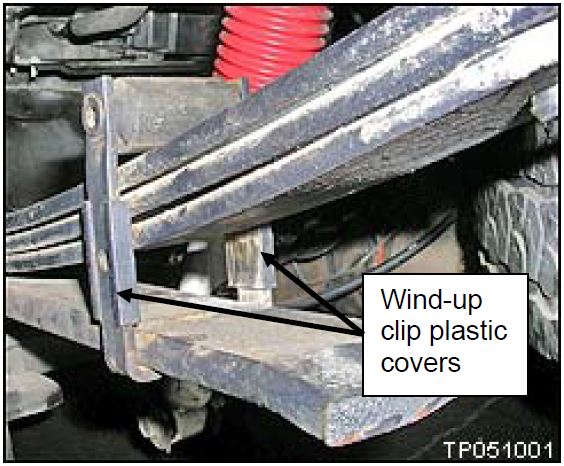
Inspect the inside of the rear leaf spring clip cover for signs of rubbing with the leaf spring. If signs of rubbing are present, remove and replace the leaf spring wind-up clip cover.
PARTS INFORMATION
| DESCRIPTION | PART # | QUANTITY |
|---|---|---|
| Cover, Wind-Up Clip | 54099-ZH30A | 2 per side |
| Screw, Flat HD | 01412-0009U | 2 |
IMPORTANT: The purpose of “ACTIONS” (above) is to give you a quick idea of the work you will be performing. You MUST closely follow the entire Service Procedure (starting on page 2) as it contains information that is essential to successfully completing this repair.
CLAIMS INFORMATION
Submit a Primary Failed Part (PP) line claim using the following claims coding:
| DESCRIPTION | PFP | OP CODE | SYM | DIA | FRT |
| RPL Both Rear Spring Wind-Up Clip Covers | (1) | NE27AA | ZL | 32 | (2) |
- Reference the Parts Information Table and use the applicable Wind-Up Clip Cover P/N as the PFP.
- Reference the current Nissan
 Warranty Flat Rate Manual and use the indicated FRT.
SERVICE PROCEDURE
WARNING: This repair MUST be done with the full vehicle weight on the suspension.
- EITHER:
Place the vehicle on a drive-on hoist or alignment rack to lift the vehicle.
OR
Leave all four tires on the ground (do not lift the vehicle).
DO NOT lift the vehicle so the weight is off the suspension.
Figure 1
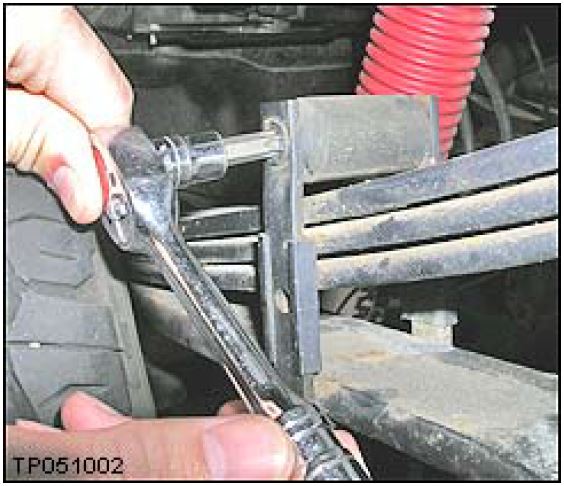
- Remove the screw from the wind-up clip.
Figure 2
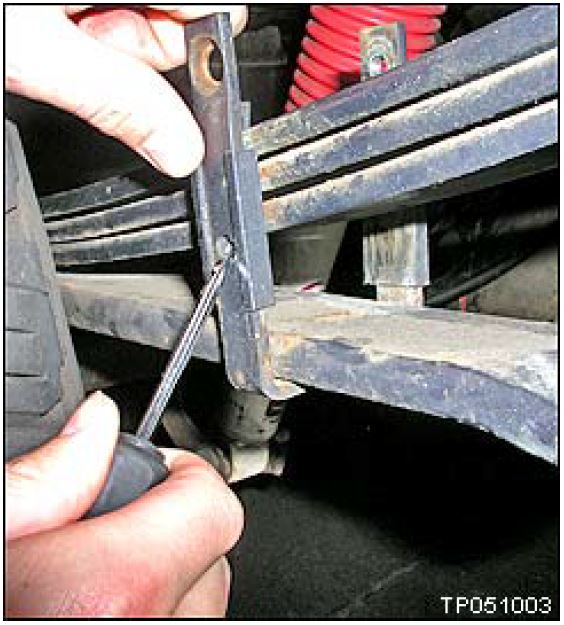
- Push IN on the positioning disc in the center of the plastic cover to release the cover from the clip.
Figure 3
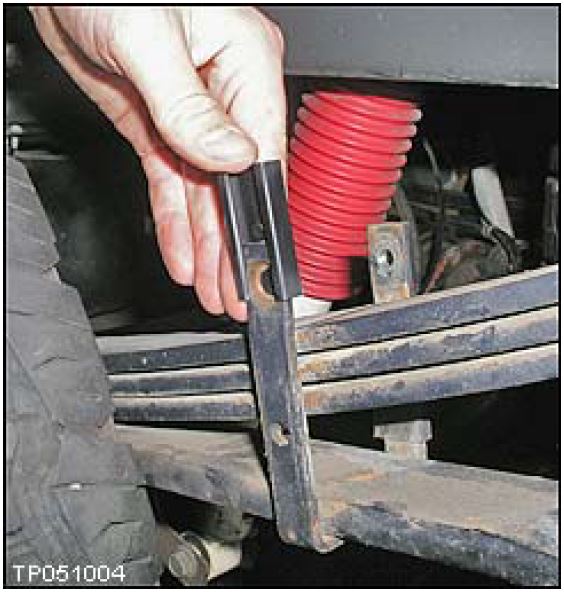
- Pull UP to slide the plastic cover off the wind-up clip. Discard this plastic cover.
Figure 4
- Install the new wind-up clip cover.
- Push IN on the positioning disc.
- Then slide the new plastic cover over the end of the wind-up clip.
Figure 5
- Repeat steps 3, 4, 5 on the other plastic cover.
- Insert the new screw.
- “Peen” the end of the screw (on the opposite side of the head) with a chisel.
- This will keep the screw from backing out (see Figure 6).
Figure 6
- Repeat steps 2 to 7 on the wind-up clip on the other side of the vehicle.
 Loading...


