
Classification:
FE21-006
Reference:
NTB21-113
Date:
December 9, 2021
CAMPAIGN ID #:
R21B8
APPLIED VEHICLES:
2021 Rogue (T33)
INTRODUCTION
Nissan is conducting this voluntary safety recall campaign, on certain specific model year 2021 Rogue vehicles, to replace the fuel level sensor unit, fuel filter and fuel pump assembly (Fuel Pump Assembly). This service will be performed at no charge to the customer for parts or labor.
IDENTIFICATION NUMBER
Nissan has assigned identification number R21B8 to this campaign. This number must appear on all communication and documentation of any nature dealing with this campaign.
REQUIRED SPECIAL TOOL(S)
Each dealer has been previously shipped one Fuel Tank Lock Ring Wrench, special tool J-45747 (Figure 1).
- Additional tools may be purchased from Tech•Mate online: nissantechmate.com, or by phone: 1-800-662-2001.
SERVICE PROCEDURE
WARNING
To avoid the risk of death or severe personal injury when inspecting and replacing fuel line parts, be sure to observe the following:
- Put a “WARNING: FLAMMABLE” sign in the workshop.
- Be sure to work in a well-ventilated area and furnish workshop with a CO2 fire extinguisher.
- Never smoke while servicing the fuel system.
- Keep open flames, sparks and other ignition sources away from the work area.
- Never bend or twist tubes when they are being installed.
- After installing tubes, check that there is no fuel leakage at the connections using the following steps:
1) Apply fuel pressure to fuel lines by turning the ignition switch “ON” (with engine stopped). Then, check for fuel leakage at connections.
2) Start the engine, increase rpm and check for fuel leakage at connections.
CAUTION
To avoid the risk of minor personal injury or property damage when inspecting and replacing fuel line parts, be sure to observe the following:
- Perform the operation with vehicle on level ground.
- Disconnect the quick connector when the tabs are completely depressed.
1. Open both rear passenger doors.
2. Lift upward on the seat cushion assembly, in the areas shown in Figure 2, to disengage the seat cushion hooks.
3. Once the seat cushion hooks are disengaged, pull the seat cushion forward.
4. Remove the seat belt buckles from the seat cushion.
5. If equipped with rear heated seats, lift the seat cushion up and disengage the rear heated seat wire harness connectors.
- There are two (2) seat heater wire harness connectors per side, for a total of four (4) seat heater wire harness connectors.
6. Remove the rear seat cushion from the vehicle and place it in a safe, clean area, to prevent staining and damage to the seat cushion.
7. Lift the carpet flap on the passenger (RH) side of the vehicle, to access the Fuel Pump Assembly inspection hole cover.
8. Using a suitable tool, turn the three (3) inspection hole cover clips clockwise 90 degrees.
9. Lift the inspection hole cover, and then disconnect the Fuel Pump Assembly wire harness connector.
10. Open the fuel filler cover, and then
insert a non-metallic plastic trim tool in
the fuel filler neck to release the
pressure inside the fuel tank.
- The plastic trim tool must be pushed in far enough to open the outer and inner fuel neck doors.
- Use care to make sure the plastic trim tool does not fall into the filler neck.
11. With the Fuel Pump Assembly wire harness connector disconnected, start the engine and allow the engine to run until the engine stops.
NOTE: The engine may run 2 – 3 minutes before fuel pressure is fully released and the engine stops.
12. Crank the engine several times to ensure fuel pressure has been fully released.
13. Open the vehicle’s hood and place protective coverings on the fenders and front bumper, as shown in Figure 8.
14. Disconnect the negative battery terminal.
- Verify the ignition is OFF before disconnecting the terminal.
- Install protective tape over the negative battery terminal.
- Wait a minimum of 3 minutes before proceeding, so that the ACC power supply may fully discharge any remaining electricity.
NOTICE
To avoid damage to the ACC power supply, do not operate the vehicle, such as locking/unlocking or opening/closing the doors, within the 3 minute waiting period.
WARNING
To avoid the risk of personal injury or damage to the vehicle, verify the ignition switch is OFF and a minimum of 3 minutes has elapsed since the negative battery terminal was disconnected, before proceeding to step 15.
15. Place shop cloths around the Fuel Pump Assembly, as shown in Figure 10.
16. Disconnect the fuel feed tube by depressing the tabs and pulling out on the fuel feed tube.
HINT: If the fuel feed tube connector sticks to the Fuel Pump Assembly, push and pull the fuel feed tube several times until it starts to move.
WARNING
To avoid the risk of death or severe personal injury when removing fuel line parts, be sure to:
- Never twist the feed tube more than necessary to remove.
- Never use any tools to disconnect the quick connector.
- Never bend or twist the fuel feed tube during disconnection or installation.
17. Cover the open end of the fuel feed tube with a plastic bag or similar item, and then move the fuel feed tube out of the way (Figure 12).
18. Using special tool J-45747, disengage and remove the Fuel Pump Assembly lock ring.
IMPORTANT:
- To reduce the impact caused by the removal operation, use a long spinner handle [handle length: 60 cm (23.62 in) or more] and slowly turn it counterclockwise.
- To prevent the lock ring wrench from being detached, securely hold down the spinner handle by hand.
- Discard the Fuel Pump Assembly lock ring, it will not be reused.
19. Remove the Fuel Pump Assembly.
- For AWD vehicles, lift the Fuel Pump Assembly, and then disconnect the wire harness connector and quick connector.
20. Remove and discard the Fuel Pump Assembly O-ring, it will not be reused.
21. Using parts cleaner, or equivalent, clean the area shown in Figure 18.
22. Install a new Fuel Pump Assembly O-ring.
23. Install the new Fuel Pump Assembly (Figure 21).
- For AWD vehicles, connect the quick connector and wire harness connector before installing the Fuel Pump Assembly (Figure 20).
24. Orient the Fuel Pump Assembly, as shown in Figure 22.
25. Temporarily install the new Fuel Pump Assembly lock ring in the position shown in Figure 24.
26. Using special tool J-45747, tighten the Fuel Pump Assembly lock ring.
IMPORTANT:
- To reduce the impact caused by the installation operation, use a long spinner handle [handle length: 60 cm (23.62 in) or more] and slowly turn it clockwise.
- To prevent the lock ring wrench from being detached, securely hold down the spinner handle by hand.
27. Connect the fuel feed tube to the Fuel Pump Assembly.
- Confirm the quick connect tabs are connected to the fuel feed tube connector.
- Confirm the fuel feed tube and the Fuel Pump Assembly are securely connected by slightly pulling on the fuel feed tube.
28. Connect the Fuel Pump Assembly wire harness connector.
29. Remove the protective tape from the negative battery terminal, and connect the negative battery terminal.
- Torque the terminal nut to 8.0 N•m (0.82 kg-m, 71 in-lb).
30. Gently remove the plastic trim tool from the fuel filler neck.
31. Cycle the ignition ON and OFF two (2) times to prime the fuel system.
32. Start the engine and check for fuel leaks in the area of repair shown in Figure 31.
33. Turn the ignition OFF.
34. Install the inspection hole cover and lock the clips by turning counterclockwise 90 degrees ( Figure 32), and then return the carpet flap to its original position (Figure 33).
35. Install the rear seat cushion assembly in the reverse order of removal.
- If equipped with rear seat heaters, be sure to connect the seat heater wire harness connectors before installing the seat cushion.
36. Erase all DTCs set during fuel pressure release using C-III plus on the CONSULT PC.
PARTS INFORMATION
| DESCRIPTION | PART NUMBER | QUANTITY |
| FUEL PUMP – IN TANK (AWD) | 17040-6RE1B | 1 |
| FUEL PUMP – IN TANK (FWD) | 17040-6RE0B | 1 |
| PLATE – LOCK, FUEL GAUGE | 17343-6RE0B | 1 |
| PACKING – FUEL GAUGE | 17342-9TA0A | 1 |
R21B8 – Fuel Pump May Overheat – 2021 Nissan Rogue
VOLUNTARY SAFETY RECALL CAMPAIGN 2021 Nissan Rogue; Fuel Pump Assembly
Remedy Instructions and TSB
RCRIT-21V957-3319.pdf 7043.595KB
Latest Recalls Documents
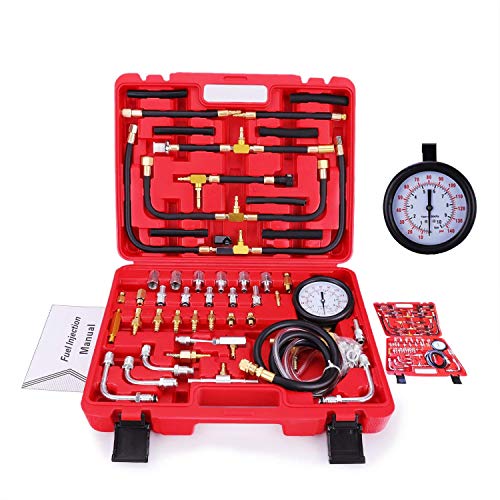
- Dual Dial For Accurate Reading, With A 140 PSI /10 Bar Scale
- Deluxe Manometer Fuel Injection Pressure Tester Gauge Kit
- Set comes in a specially designed molded case to make storage easy and organized.
- A time saving quick coupler connection at the end of he gauge hose makes a speedy and efficient couple possible with most adapters.
- The included adapters, hoses and fittings cover all fuel injection systems and most cars and trucks world wide!
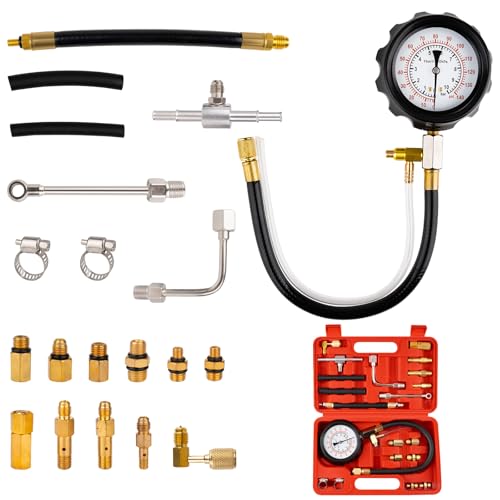
- Compatibility Note: For further confirmation of specific model compatibility, refer to the vehicle owner's manual or contact a professional technician. Excludes Fo/rd, K/I/A, Bo/s/ch, C/I/S Je/tro/nic, G//M Th/rot/tle Bo/dy Systems, A/cu/ra, J/ee/p, B/M/W, Ni/s/san, and To/yo/ta fuel systems. Not compatible with small/non/standard S/chra/der vallves, high/pre/ssure direct in/ject/ed engines, or die//sel injection pumps. Verify your vehicle’s vallve size and pressure specs before purchase
- Wide Compatibility: This fuel pressure tester kit comes with multiple adapters for most gasoline engines in trucks, cars, motorcycles and RVs. But not compatible with diesel high - pressure injection pumps or direct injection engines
- Accurate Testing: The fuel pressure tester features high - precision sensors for accurate measurement of fuel system pressure changes. Measures range 0-140PSI/ 0-10bar dual color coded scale to diagnose fuel supply and injection issues
- Multipurpose Use: The 8 inches hose fits all M6 fuel pressure test ports. The 15 inches hose connects snugly to any 1/4" standard schrader valve. The M8, M10, M12, and M14 adapters make sure this tool kit can be used on most cars and vehicles
- Corrosion Resistance: Crafted from high - strength materials, the fuel pressure tester offers excellent corrosion and impact resistance. It ensures long - term stability and reliability even in harsh working conditions
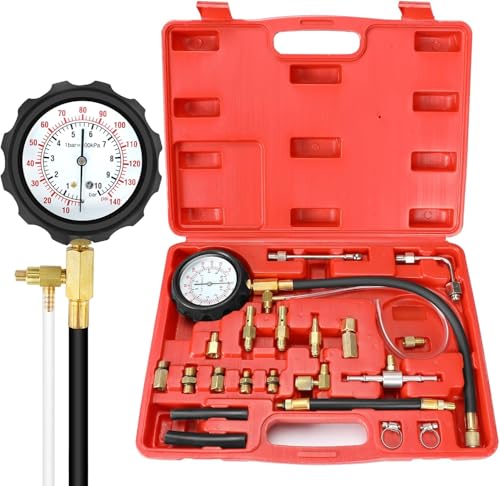
- Universal Design: The included adapters, hoses and fittings cover most fuel injection systems and Gas Engine Cars, Motorcycles, Trucks, SUVs, ATVs, UTVs, RVs. (Does not compatible with Bosch, CIS Jetronic, TB System on GM vehicles, 2012 Dodge 5.7L, 1999 GNMC Sonoma 4.3). Please verify your vehicle's vallve size and pressure specs before purchase
- Ideal For Mechanics: Fuel Injection Pump Pressure / Oil Combustion Spraying Pressure Gauge Teste
- Durable: Designed for repeated use with high quality materials
- Convenient and Safe Design: Fuel pressure tester with a quick release valve button could offer single-handed operation inflation and deflation
- Measuring Range: 0-140psi (0-10 bar)
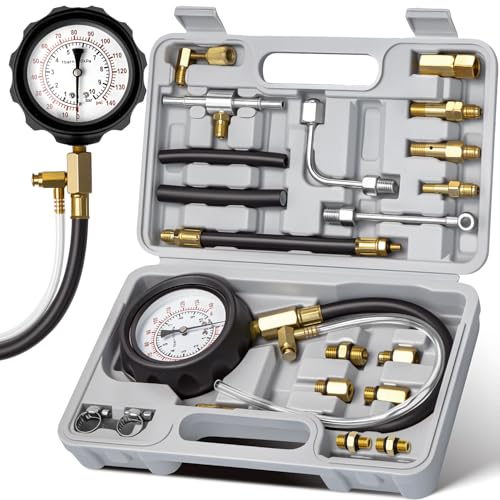
- ACCURATE DUAL-SCALE GAUGE: Features a shock-resistant dry gauge with built-in damping mechanism, providing clear 0–140 PSI and 0–10 BAR dual scales for precise fuel system diagnostics
- DURABLE CONSTRUCTION: Built with OEM-grade brass, aluminum, and steel components for long-lasting performance in tough environments
- COMPLETE ADAPTER SET: Includes 8 adapters (M6 to M14) and two hoses with quick-release valve for easy and safe testing on various fuel ports
- USER-FRIENDLY & SAFE: Comes with relief valve and drain hose for safe fuel recovery; always follow included safety guidelines for optimal use
- COMPATIBILITY NOTICE: This tester fits most gasoline engines in vehicles. But it will NOT FIT vehicles with Bosch, CIS Jetronic, GM TBI, or Direct Injection systems. Check Your Model as it may not fit certain Ford, KIA, Acura, Jeep, BMW, Nissan, and Toyota models that use small or non-standard Schrader valves. We strongly recommend verifying your vehicle's specifications to guarantee a perfect fit.

- UNIVERSAL DESIGN ---Used on any engine you need to read fuel psi on.Helps identify and diagnose low fuel pressure, a faulty fuel pressure regulator, leaking injectors, fuel leaks, and clogged fuel filters.The included adapters, hoses and fittings cover all fuel injection systems and most cars and trucks world wide!
- FORD ADAPTERS INCLUDED ---Come with 3 adapters with hoses fit with most of the Ford vehicles.
- PARAMETER---Double Scale Gauge:0-10bar,0-140psi.Three size adapters :6.30mm(SAE 1/4)7.89mm(SAE 5/16)9.49mm(SAE 3/8).
SEOCONTENT-START
1/15 Classification: Reference: Date: FE21-006 NTB21-113 December 9, 2021 VOLUNTARY SAFETY RECALL CAMPAIGN 2021 ROGUE; FUEL PUMP ASSEMBLY CAMPAIGN ID #: R21B8 APPLIED VEHICLES: 2021 Rogue (T33) Check Service COMM or Dealer Business Systems (DBS) National Service History to confirm campaign eligibility. INTRODUCTION Nissan is conducting this voluntary safety recall campaign, on certain specific model year 2021 Rogue vehicles, to replace the fuel level sensor unit, fuel filter and fuel pump assembly (Fuel Pump Assembly). This service will be performed at no charge to the customer for parts or labor. IDENTIFICATION NUMBER Nissan has assigned identification number R21B8 to this campaign. This number must appear on all communication and documentation of any nature dealing with this campaign. DEALER RESPONSIBILITY It is the dealer’s responsibility to check Service COMM or Dealer Business Systems (DBS) National Service History for the campaign status on each vehicle falling within the range of this voluntary safety recall which for any reason enters the service department. This includes vehicles purchased from private parties or presented by transient (tourist) owners and vehicles in a dealer’s inventory. Federal law requires that new vehicles in dealer inventory which are the subject of a safety recall must be corrected prior to sale. Failure to do so can result in civil penalties by the National Highway Traffic Safety Administration. While federal law applies only to new vehicles, Nissan strongly encourages dealers to correct any used vehicles in their inventory before they are retailed. Nissan Bulletins are intended for use by qualified technicians, not ‘do-it-yourselfers’. Qualified technicians are properly trained individuals who have the equipment, tools, safety instruction, and know-how to do a job properly and safely. NOTE: If you believe that a described condition may apply to a particular vehicle, DO NOT assume that it does. See your Nissan dealer to determine if this applies to your vehicle. 2/15 NTB21-113 REQUIRED SPECIAL TOOL(S) Each dealer has been previously shipped one Fuel Tank Lock Ring Wrench, special tool J-45747 (Figure 1). Additional tools may be purchased from Tech•Mate online: nissantechmate.com, or by phone: 1-800-662-2001. Figure 1 3/15 NTB21-113 SERVICE PROCEDURE To avoid the risk of death or severe personal injury when inspecting and replacing fuel line parts, be sure to observe the following: Put a “WARNING: FLAMMABLE” sign in the workshop. Be sure to work in a well-ventilated area and furnish workshop with a CO2 fire extinguisher. Never smoke while servicing the fuel system. Keep open flames, sparks and other ignition sources away from the work area. Never bend or twist tubes when they are being installed. After installing tubes, check that there is no fuel leakage at the connections using the following steps: 1) Apply fuel pressure to fuel lines by turning the ignition switch “ON” (with engine stopped). Then, check for fuel leakage at connections. 2) Start the engine, increase rpm and check for fuel leakage at connections. To avoid the risk of minor personal injury or property damage when inspecting and replacing fuel line parts, be sure to observe the following: Perform the operation with vehicle on level ground. Disconnect the quick connector when the tabs are completely depressed. 4/15 NTB21-113 Figure 2 Figure 3 Figure 4 1. Open both rear passenger doors. 2. Lift upward on the seat cushion assembly, in the areas shown in Figure 2, to disengage the seat cushion hooks. 3. Once the seat cushion hooks are disengaged, pull the seat cushion forward. 4. Remove the seat belt buckles from the seat cushion. 5. If equipped with rear heated seats, lift the seat cushion up and disengage the rear heated seat wire harness connectors. There are two (2) seat heater wire harness connectors per side, for a total of four (4) seat heater wire harness connectors. 6. Remove the rear seat cushion from the vehicle and place it in a safe, clean area, to prevent staining and damage to the seat cushion. 7. Lift the carpet flap on the passenger (RH) side of the vehicle, to access the Fuel Pump Assembly inspection hole cover. Seat heater wire harness connector Carpet flap connectors 5/15 NTB21-113 Figure 5 Figure 6 Figure 7 8. Using a suitable tool, turn the three (3) inspection hole cover clips clockwise 90 degrees. 9. Lift the inspection hole cover, and then disconnect the Fuel Pump Assembly wire harness connector. 10. Open the fuel filler cover, and then insert a non-metallic plastic trim tool in the fuel filler neck to release the pressure inside the fuel tank. The plastic trim tool must be pushed in far enough to open the outer and inner fuel neck doors. Use care to make sure the plastic trim tool does not fall into the filler neck. Carpet flap Inspection hole cover Clips (3) Inspection hole cover Fuel Pump Assembly wire harness connector Plastic trim tool 6/15 NTB21-113 11. With the Fuel Pump Assembly wire harness connector disconnected, start the engine and allow the engine to run until the engine stops. NOTE: The engine may run 2 – 3 minutes before fuel pressure is fully released and the engine stops. 12. Crank the engine several times to ensure fuel pressure has been fully released. Figure 8 Figure 9 To avoid damage to the ACC power supply, do not operate the vehicle, such as locking/unlocking or opening/closing the doors, within the 3 minute waiting period. 13. Open the vehicle’s hood and place protective coverings on the fenders and front bumper, as shown in Figure 8. 14. Disconnect the negative battery terminal. Verify the ignition is OFF before disconnecting the terminal. Install protective tape over the negative battery terminal. Wait a minimum of 3 minutes before proceeding, so that the ACC power supply may fully discharge any remaining electricity. Negative battery terminal disconnected and tape applied to battery terminal Protective coverings 7/15 NTB21-113 To avoid the risk of personal injury or damage to the vehicle, verify the ignition switch is OFF and a minimum of 3 minutes has elapsed since the negative battery terminal was disconnected, before proceeding to step 15. Figure 10 Figure 11 15. Place shop cloths around the Fuel Pump Assembly, as shown in Figure 10. 16. Disconnect the fuel feed tube by depressing the tabs and pulling out on the fuel feed tube. HINT: If the fuel feed tube connector sticks to the Fuel Pump Assembly, push and pull the fuel feed tube several times until it starts to move. To avoid the risk of death or severe personal injury when removing fuel line parts, be sure to: o Never twist the feed tube more than necessary to remove. o Never use any tools to disconnect the quick connector. o Never bend or twist the fuel feed tube during disconnection or installation. Shop cloth Shop cloth Depress tabs Pull the fuel feed tube Fuel feed tube 8/15 NTB21-113 Figure 12 18. Using special tool J-45747, disengage and remove the Fuel Pump Assembly lock ring. IMPORTANT: o To reduce the impact caused by the removal operation, use a long spinner handle [handle length: 60 cm (23.62 in) or more] and slowly turn it counterclockwise. o To prevent the lock ring wrench from being detached, securely hold down the spinner handle by hand. o Discard the Fuel Pump Assembly lock ring, it will not be reused. Figure 13 Figure 14 17. Cover the open end of the fuel feed tube with a plastic bag or similar item, and then move the fuel feed tube out of the way (Figure 12). Fuel feed tube with plastic bag installed on the open end. Fuel Pump Assembly lock ring 9/15 NTB21-113 Figure 15 Figure 16 Figure 17 19. Remove the Fuel Pump Assembly. For AWD vehicles, lift the Fuel Pump Assembly, and then disconnect the wire harness connector and quick connector. 20. Remove and discard the Fuel Pump Assembly O-ring, it will not be reused. Disconnect wire harness connector Disconnect quick connector Remove and discard O-ring Fuel Pump Assembly 10/15 NTB21-113 Figure 18 Figure 19 23. Install the new Fuel Pump Assembly (Figure 21). For AWD vehicles, connect the quick connector and wire harness connector before installing the Fuel Pump Assembly (Figure 20). Figure 20 Figure 21 21. Using parts cleaner, or equivalent, clean the area shown in Figure 18. 22. Install a new Fuel Pump Assembly O-ring. Clean this area New O-ring Connect wire harness connector Connect quick connector 11/15 NTB21-113 Figure 22 25. Temporarily install the new Fuel Pump Assembly lock ring in the position shown in Figure 24. Figure 23 Figure 24 24. Orient the Fuel Pump Assembly, as shown in Figure 22. Front of vehicle Lock ring guard Lock ring guard 12/15 NTB21-113 26. Using special tool J-45747, tighten the Fuel Pump Assembly lock ring. Turn the Fuel Pump Assembly lock ring, until it fully engages the fuel tank (Figure 26). IMPORTANT: o To reduce the impact caused by the installation operation, use a long spinner handle [handle length: 60 cm (23.62 in) or more] and slowly turn it clockwise. o To prevent the lock ring wrench from being detached, securely hold down the spinner handle by hand. Figure 25 Figure 26 Figure 27 27. Connect the fuel feed tube to the Fuel Pump Assembly. Confirm the quick connect tabs are connected to the fuel feed tube connector. Confirm the fuel feed tube and the Fuel Pump Assembly are securely connected by slightly pulling on the fuel feed tube. Tighten lock ring until it fully engages Quick connect tabs Fuel feed tube connector 13/15 NTB21-113 Figure 28 Figure 29 Figure 30 28. Connect the Fuel Pump Assembly wire harness connector. 29. Remove the protective tape from the negative battery terminal, and connect the negative battery terminal. Torque the terminal nut to 8.0 N•m (0.82 kg-m, 71 in-lb). 30. Gently remove the plastic trim tool from the fuel filler neck. Connect Fuel Pump Assembly wire harness connector Plastic trim tool Negative battery terminal 14/15 NTB21-113 31. Cycle the ignition ON and OFF two (2) times to prime the fuel system. Figure 31 33. Turn the ignition OFF. 34. Install the inspection hole cover and lock the clips by turning counterclockwise 90 degrees ( Figure 32), and then return the carpet flap to its original position (Figure 33). Figure 32 Figure 33 35. Install the rear seat cushion assembly in the reverse order of removal. If equipped with rear seat heaters, be sure to connect the seat heater wire harness connectors before installing the seat cushion. 36. Erase all DTCs set during fuel pressure release using C-III plus on the CONSULT PC. 32. Start the engine and check for fuel leaks in the area of repair shown in Figure 31. Carpet flap Inspection hole cover Clips (3) Carpet flap 15/15 NTB21-113 PARTS INFORMATION DESCRIPTION PART NUMBER QUANTITY FUEL PUMP – IN TANK (AWD) 17040-6RE1B 1 FUEL PUMP – IN TANK (FWD) 17040-6RE0B 1 PLATE – LOCK, FUEL GAUGE 17343-6RE0B 1 PACKING – FUEL GAUGE 17342-9TA0A 1 CLAIMS INFORMATION Submit a “CM” line claim using the following claims coding: CAMPAIGN (“CM”) ID DESCRIPTION OP CODE FRT R21B8 Replace Fuel Pump Assembly (FWD) R21B80 0.8 Replace Fuel Pump Assembly (AWD) R21B81 0.9 AMENDMENT HISTORY PUBLISHED DATE REFERENCE DESCRIPTION December 9, 2021 NTB21-113 Original bulletin published
**************************************************************************************************************
SEOCONTENT-END
This product presentation was made with AAWP plugin.